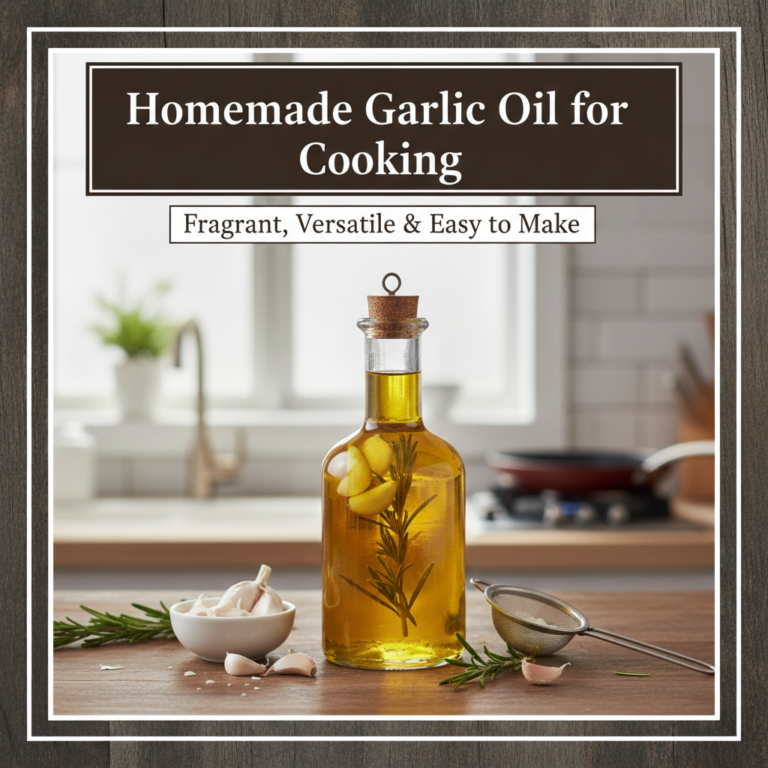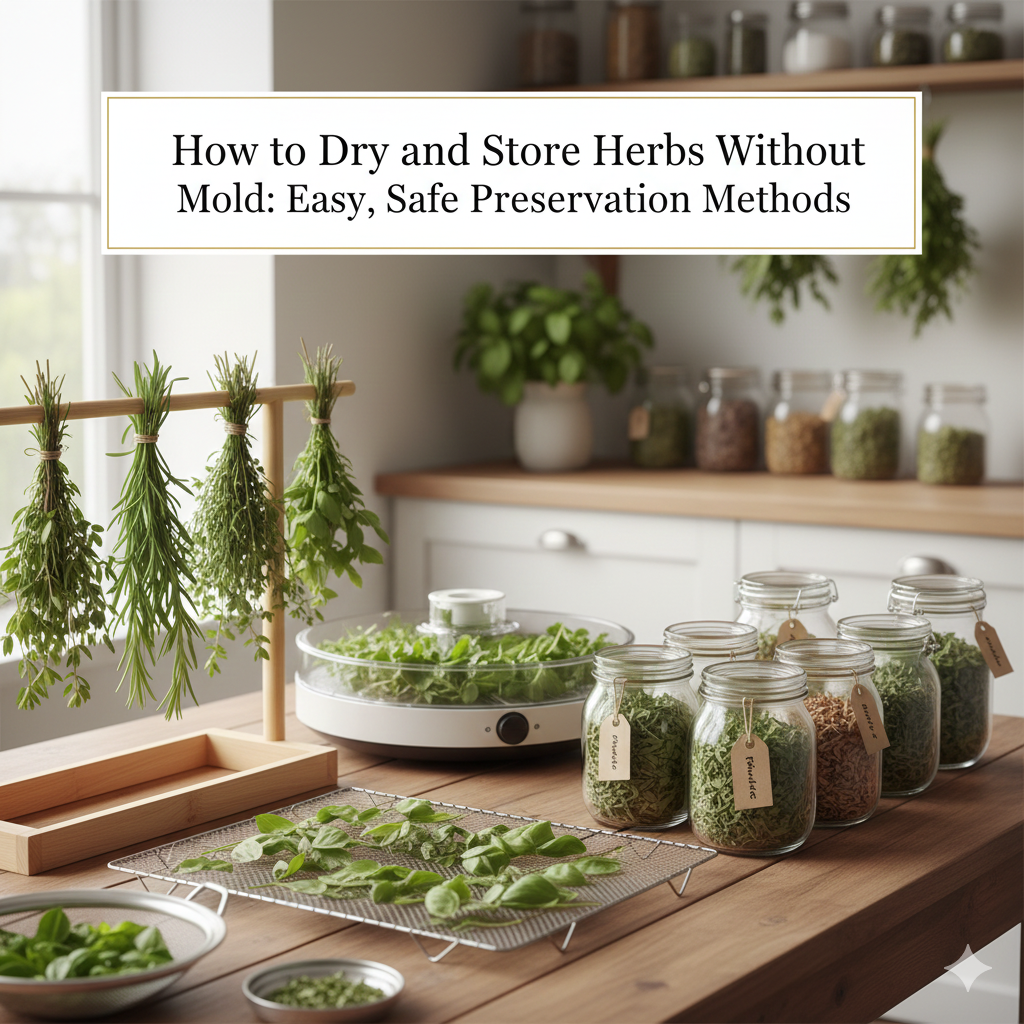
How to Dry and Store Herbs Without Mold: Easy, Safe Preservation Methods
Few things disappoint quite like reaching for your carefully dried herbs only to discover fuzzy mold creeping across leaves you spent time harvesting and preparing. Learning how to dry and store herbs without mold transforms your preservation efforts from frustrating gambles into reliable successes that keep your pantry stocked with flavorful, safe herbs year-round. The difference between thriving dried herbs and moldy failures comes down to understanding moisture control, proper timing, and storage fundamentals that anyone can master.
Understanding Why Mold Develops
Mold spores exist everywhere, constantly searching for favorable growing conditions. They need three things to thrive: moisture, warmth, and organic material. Your herbs provide the organic material, room temperature supplies warmth, so controlling moisture becomes your primary weapon against mold. Even small amounts of residual water in dried herbs create perfect environments for mold colonization.
The challenge intensifies because different herbs contain varying moisture levels naturally. Basil and mint are quite juicy, requiring longer drying times than woody rosemary or thyme. Thick stems retain water longer than delicate leaves. Understanding these variables helps you adjust techniques rather than following rigid timelines that might leave some herbs perfect while others remain dangerously damp.
Harvesting Herbs at the Right Moment
Success starts before drying begins—proper harvesting sets the foundation for mold-free results. Cut herbs mid-morning after dew evaporates but before afternoon heat diminishes essential oils. This timing ensures leaves are dry on the surface while oil content peaks, maximizing both safety and flavor.
Choose healthy, unblemished stems without any signs of disease, insect damage, or wilting. Mold often begins on damaged tissue, so selecting pristine material prevents introducing problems from the start. Harvest before flowering when possible since leaf flavor concentrates most intensely during vegetative growth phases.
Rinse harvested herbs gently under cool running water only if they’re visibly dirty or dusty. Garden-grown herbs often need washing while market purchases might not. Shake vigorously to remove surface water, then lay them on clean kitchen towels. Pat gently but thoroughly—every water droplet you leave behind extends drying time and increases mold risk. Some experienced preservers skip washing entirely if herbs are clean, eliminating this moisture source completely.
Air Drying Methods That Prevent Mold
Traditional air drying remains the simplest approach for how to dry herbs at home, requiring no special equipment beyond patience and proper conditions. The key lies in providing abundant airflow that whisks moisture away faster than mold can establish itself.
Bundle hanging method:
Gather four to six stems into small bundles—resist making them larger since dense clusters trap moisture. Secure bundles with rubber bands rather than string since herbs shrink during drying and string loosens while rubber bands maintain tension. Hang bundles upside down in a warm, dark, well-ventilated space away from direct sunlight that degrades color and flavor.
Ideal locations include pantries with ventilation, unused closets with slightly opened doors, or covered porches protected from weather. Aim for temperatures between 70°F and 80°F with humidity below 60 percent. Basements often seem convenient but frequently harbor too much humidity. Attics work wonderfully if they’re not excessively hot—above 90°F can cook herbs rather than dry them.
Check bundles daily, gently feeling leaves for crispness. Properly dried herbs crumble easily when rubbed between fingers, producing powdery texture rather than bending or feeling leathery. Small bundles typically finish in five to ten days depending on herb type and environmental conditions.
Screen or rack drying:
For herbs with small leaves or delicate structures that don’t bundle well, screen drying works beautifully. Stretch mesh screen fabric across wooden frames, or use cooling racks covered with cheesecloth. Spread individual leaves or small sprigs in single layers, ensuring pieces don’t touch or overlap.
Position screens in the same warm, dark, airy locations recommended for bundles. Flip herbs daily to expose all surfaces to air circulation. This method often completes faster than bundling since every leaf surface receives direct airflow—typically three to seven days for most herbs.
Accelerated Drying with Dehydrators
Food dehydrators provide controlled environments that dramatically reduce drying time while maintaining quality. These appliances circulate warm air at consistent temperatures, eliminating the guesswork of ambient air drying while reducing mold opportunities through speed.
Optimal dehydrator settings:
Set temperatures between 95°F and 115°F for herb drying—lower than fruits or vegetables require. Excessive heat volatilizes essential oils that provide flavor and aroma. Start at 95°F for delicate herbs like basil, cilantro, or dill. Hardier options like rosemary, thyme, or sage tolerate 115°F without issue.
Arrange herb sprigs or individual leaves on dehydrator trays in single layers with space between pieces. Avoid stacking or overlapping that creates moisture pockets. Check herbs every two hours initially, then hourly as they near completion. Most herbs finish within two to four hours—dramatically faster than air drying.
The investment in a dehydrator pays dividends if you regularly preserve herbs, mushrooms, fruits, or vegetables. Even basic models under fifty dollars perform adequately, while more expensive versions with timers and multiple temperature settings offer convenience features.
Oven Drying for Quick Results
Standard kitchen ovens provide another accelerated option, though they require more attention than dehydrators and risk overheating that compromises quality. This method suits occasional herb preservation when dehydrator purchase isn’t justified.
Set your oven to its lowest temperature—hopefully between 150°F and 180°F. Many ovens don’t go lower, which approaches the threshold of “cooking” rather than drying. Prop the oven door open slightly using a wooden spoon to allow moisture escape and prevent excessive heat buildup.
Spread herbs on parchment-lined baking sheets in single layers. Place sheets on center racks for even heat distribution. Check every fifteen minutes, rotating sheets and examining herbs closely. They typically finish in one to three hours depending on oven temperature and herb type.
Watch vigilantly for browning or darkening that indicates heat damage. If herbs develop toasted aromas rather than maintaining their characteristic scent, your oven runs too hot for this application. Oven drying works acceptably but lacks the precision and safety margins dehydrators provide.
Testing for Complete Dryness
The critical skill in preventing mold on dried herbs involves accurately determining when drying completes. Harvest too early and residual moisture invites mold. Wait too long and you’re wasting time without improving results.
The crumble test:
Properly dried herb leaves shatter into small pieces when crushed between fingers. They should feel papery and brittle, not leathery or pliable. Stems require additional time—they should snap cleanly rather than bending. If stems bend at all, continue drying even if leaves seem ready since stems retain moisture longest.
The sealed jar test:
Once herbs seem dry, place a small amount in a sealed glass jar for twenty-four hours. If condensation appears on jar sides or lid, moisture remains and further drying is essential. Perfectly dry herbs produce zero condensation regardless of how long they sit sealed.
This test provides insurance against premature storage that ruins entire batches. Spending one extra day confirming dryness beats discovering mold weeks later after you’ve stored significant quantities.
Proper Storage Containers and Conditions
Even perfectly dried herbs deteriorate or develop mold if stored incorrectly. Container selection and storage location matter as much as the drying process itself when learning storing dried herbs properly.
Ideal container characteristics:
Glass jars with tight-fitting lids provide excellent storage, protecting herbs from moisture and light while remaining inert—they won’t interact chemically with contents. Amber or dark glass offers superior protection from light degradation. Standard canning jars work perfectly, as do repurposed spice jars thoroughly cleaned and dried.
Food-grade plastic containers function acceptably short-term but allow more air and moisture transmission than glass over extended periods. If using plastic, choose opaque versions rather than clear. Metal tins work well if lined with paper or fabric since direct metal contact can affect flavor in some herbs.
Avoid paper bags or cardboard boxes for long-term storage—they provide insufficient protection from humidity and allow light penetration. These containers work temporarily during drying but transfer herbs to better protection before extended storage.
Preventing moisture intrusion:
Even dried herbs are hygroscopic, meaning they reabsorb moisture from air over time. Store jars in cool, dark, dry locations—kitchen cabinets away from stoves and dishwashers, pantries, or closets. Avoid areas prone to temperature fluctuations or humidity spikes.
Some preservers add food-grade desiccant packets (the little silica gel packets found in shoe boxes) to jars for extra moisture protection. This provides insurance in humid climates or questionable storage areas, though properly dried herbs in good containers shouldn’t strictly require this measure.
Label everything clearly with herb name and date—dried herbs can look remarkably similar, and tracking age helps ensure you use oldest stock first while quality remains peak.
Long-Term Storage Best Practices
Understanding proper long-term herb preservation extends the life of your dried herbs significantly beyond typical expectations. Properly handled dried herbs maintain quality for one to three years—far longer than most people realize.
Whole leaves versus crushed:
Store herbs as whole leaves rather than pre-crushed. Crushing breaks cell walls, releasing essential oils that then dissipate over time. Whole leaves retain oils internally until you crush them immediately before use. This single practice dramatically extends flavor life.
Crush or crumble only the amount needed for each recipe, ideally just moments before adding to dishes. The burst of aroma when you crush dried herbs between your fingers should be intense—if it isn’t, your herbs have aged past prime or weren’t dried properly.
Monitoring stored herbs:
Check stored herbs monthly for the first three months, then quarterly thereafter. Open jars and examine contents for any signs of moisture, mold, or off-odors. A quick visual inspection catches problems before they affect your entire supply.
If you discover moisture or early mold signs, spread affected herbs on trays and re-dry them immediately. If mold has progressed significantly or herbs smell musty, discard them—your health isn’t worth risking. Mold produces mycotoxins that persist even after mold dies, so affected herbs aren’t salvageable through cooking.
Special Considerations for Different Herb Types
Not all herbs dry identically—understanding these differences improves your results across various species.
High-moisture herbs:
Basil, mint, cilantro, parsley, and chives contain substantial water, requiring extra care and extended drying times. These benefit most from dehydrator drying’s speed, which races moisture removal before deterioration begins. When air drying these herbs, ensure exceptionally good ventilation and consider smaller bundles than you’d use for woody herbs.
Woody, low-moisture herbs:
Rosemary, thyme, oregano, sage, and bay leaves contain less water naturally and dry more forgivingly. They tolerate air drying beautifully and resist mold more reliably. These herbs also store longer than delicate varieties—up to three years in ideal conditions.
Seed-bearing herbs:
Dill, coriander (cilantro seeds), fennel, and caraway require different handling since you’re preserving seeds rather than leaves. Harvest when seeds mature but before they drop naturally. Bundle stems upside down with paper bags secured around flower heads to catch falling seeds. The bag prevents loss while allowing air circulation around stems.
Reviving Questionable Herbs
Sometimes herbs seem suspicious—perhaps slightly soft or musty-smelling—without clear mold visible. Don’t automatically discard them; often they’re salvageable.
Spread questionable herbs on dehydrator trays or baking sheets and apply low heat (95°F to 110°F) for one to two hours. This re-drying often resolves minor moisture issues before mold establishes. The heat also kills surface mold spores that haven’t produced visible growth yet.
After re-drying, smell herbs carefully. They should smell like themselves—oregano should smell like oregano, not musty or off. Any strange odors indicate they’ve passed the point of salvation and should be discarded.
Common Mistakes That Invite Mold
Learning from others’ errors saves you from repeating them. These mistakes appear frequently among new herb preservers:
Drying in sealed containers or bags: Moisture needs escape routes during drying. Sealed environments trap humidity, guaranteeing mold. Use breathable materials like paper bags with holes punched throughout, or better yet, open air circulation.
Insufficient initial drying: The single most common error involves declaring herbs “done” prematurely. When in doubt, dry longer. Herbs can’t be “too dry” for storage purposes—only heat damage from excessive temperature compromises them, not extended time at appropriate temperatures.
Storing before completely cool: Herbs continue releasing small amounts of moisture as they cool from drying heat. Seal them while warm and that moisture condenses inside containers, creating perfect mold conditions. Always let dried herbs reach room temperature completely before transferring to storage containers.
Ignoring environmental humidity: Drying herbs during rainy, humid weeks extends drying time significantly, sometimes impossibly so. If your ambient humidity exceeds 70 percent, air drying becomes very challenging. Use dehydrators or ovens during humid periods, or wait for drier weather.
Your Path to Mold-Free Herb Preservation
Start with small batches of one or two herb varieties to build confidence without overwhelming yourself. Hardy options like rosemary or thyme forgive errors better than delicate basil, making them ideal for beginners learning homemade dried herbs techniques.
Notice how different herbs behave during drying. Observe how long each type requires under your specific conditions. These observations build intuition that makes future batches easier and more reliable.
Keep notes about what worked and what needs adjustment. Did your bundles seem too large? Were dehydrator temperatures perfect or should they be tweaked? Recording these details creates personalized guidelines more valuable than generic instructions since they account for your unique environment and equipment.
Welcome to preserving herbs that remain flavorful, aromatic, and completely safe for months or years. Mastering how to dry and store herbs without mold connects you to food preservation traditions while reducing waste and ensuring your cooking always has access to the seasonings it needs. Your mold-free herb pantry awaits.