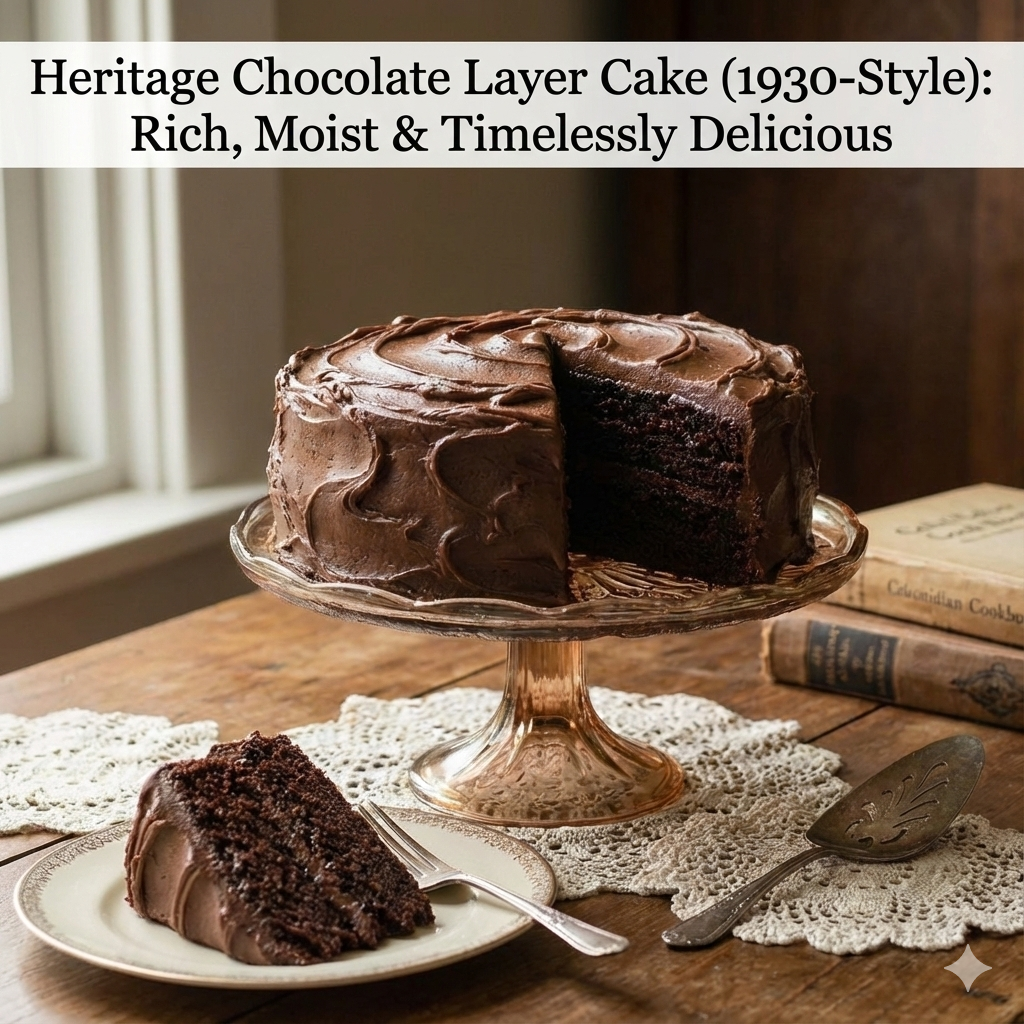
Heritage Chocolate Layer Cake (1930-Style): Rich, Moist & Timelessly Delicious
Long before cake mixes promised convenience in a box, home bakers created spectacular desserts from basic pantry staples and careful technique. This heritage chocolate layer cake resurrects those Depression-era methods that relied on ingenuity rather than expensive ingredients, producing results that modern shortcuts can’t quite replicate. It’s the kind of old-fashioned chocolate layer cake your grandmother might have made—deeply chocolatey, impossibly moist, with tender crumb that melts on your tongue.
What Makes This Vintage Chocolate Cake Special
The 1930s chocolate cake recipe approach differs fundamentally from contemporary versions. Bakers of that era worked with limitations—butter was precious, eggs sometimes scarce, and vanilla extract a luxury. Yet they created cakes that remained moist for days, developed complex flavor through simple ingredients, and satisfied completely without fancy decorations or exotic additions.
This classic chocolate cake recipe uses hot water to bloom cocoa powder, intensifying chocolate flavor while creating remarkably tender texture. The method incorporates both baking soda and baking powder for reliable rise and fine crumb. Buttermilk adds subtle tang that balances sweetness while its acidity reacts with leavening agents for exceptional lightness. These heritage baking recipes techniques produce results that taste both familiar and somehow better than you remember—comfort elevated through proper execution.
Gathering Your Simple Ingredients
Part of this cake’s genius lies in its accessibility. You likely own everything needed already, requiring no specialty items or expensive imports. Quality matters more than quantity—use the best cocoa powder your budget allows since it provides the primary chocolate flavor.
For the cake layers:
- Two cups all-purpose flour
- Two cups granulated sugar
- Three-quarters cup natural unsweetened cocoa powder (not Dutch-process)
- Two teaspoons baking soda
- One teaspoon baking powder
- One teaspoon fine salt
- One cup buttermilk, room temperature
- One cup strong brewed coffee, still hot
- Half cup vegetable oil
- Two large eggs, room temperature
- Two teaspoons vanilla extract
For the heritage buttercream:
- One cup unsalted butter, softened to room temperature
- Four cups powdered sugar
- Half cup natural unsweetened cocoa powder
- Quarter cup whole milk, plus more as needed
- Two teaspoons vanilla extract
- Quarter teaspoon salt
The ingredient list intentionally avoids chocolate bars, melted chocolate, or sour cream—additions that came later. This traditional chocolate cake layers formula relies on cocoa powder and simple dairy for its character, producing flavor that’s direct and honest rather than complex.
Preparing Your Baking Setup
Before mixing anything, organize your workspace and prepare pans properly—rushing these steps causes problems later. Position an oven rack in the center and set temperature to 350°F. Most vintage recipes called for moderate ovens, which translates to modern 350°F—not the aggressive 375°F many contemporary recipes demand.
Prepare two nine-inch round cake pans by buttering them thoroughly, then lining bottoms with parchment circles cut to fit exactly. Butter the parchment too, then dust everything with cocoa powder, tapping out excess. This chocolate-based coating prevents white flour spots on your finished cake’s exterior—a small detail that improves appearance significantly.
Mixing the Batter with Period-Appropriate Technique
Depression-era bakers often mixed cakes by hand, but electric mixers work beautifully here while saving considerable effort. The key lies in understanding what you’re trying to achieve at each stage rather than mindlessly following steps.
Sift together flour, sugar, cocoa powder, baking soda, baking powder, and salt into your largest mixing bowl. Yes, sift—this vintage chocolate cake method demands it. Sifting aerates dry ingredients while breaking up cocoa lumps that create bitter pockets in finished cake. Use a whisk if you lack a proper sifter, stirring vigorously to achieve similar results.
Create a well in the center of dry ingredients. Pour in buttermilk, vegetable oil, eggs, and vanilla. Using an electric mixer on medium speed, beat for two full minutes. The batter will be thick and somewhat stiff at this point—resist the urge to add liquid yet.
With mixer running on low speed, carefully pour in the hot coffee. The batter will transform dramatically, becoming thin and pourable—almost alarmingly so. This seems wrong, but trust the process. The liquid batter bakes into supremely tender cake because gluten can’t develop excessively in such wet conditions.
Baking to Tender Perfection
Divide batter evenly between prepared pans—using a kitchen scale ensures identical layers, though eyeballing works if you’re careful. Each pan should be roughly two-thirds full. Tap pans firmly on the counter three times to release air bubbles trapped in the thin batter.
Bake for thirty to thirty-five minutes, resisting the temptation to open the oven door before thirty minutes elapse. Every peek releases heat and extends baking time. The cakes are done when a toothpick inserted into the center emerges with a few moist crumbs clinging to it—not completely clean, which indicates overbaking, but not wet batter either.
The surface should spring back when gently pressed, and edges will have pulled slightly away from pan sides. Internal temperature should reach between 200°F and 205°F if you’re using a thermometer.
Remove cakes from oven and let them rest in pans on cooling racks for exactly fifteen minutes. This period allows structure to set while residual heat continues gentle cooking. After fifteen minutes, run a thin knife around edges to ensure nothing sticks, then invert cakes onto racks. Peel off parchment circles and let layers cool completely before frosting—at least two hours at room temperature or one hour if you’re impatient and willing to refrigerate them.
Creating Authentic Heritage Buttercream
While this homemade chocolate layer cake would have been frosted with various options in the 1930s—boiled frosting, seven-minute frosting, or simple buttercream—we’re using a chocolate buttercream that honors the era’s simplicity while delivering modern expectations for rich frosting.
Beat softened butter in a large bowl using an electric mixer on medium speed for two minutes until fluffy and pale. This step incorporates air that creates light texture despite the frosting’s richness. Add powdered sugar and cocoa powder in four additions, beating after each until incorporated. The mixture will seem impossibly thick and crumbly—don’t worry.
Add milk, vanilla, and salt, then beat on low speed initially to prevent sugar clouds, then increase to medium-high and beat for three full minutes. The frosting will transform into something smooth, glossy, and spreadable. If it seems too stiff, add milk by the teaspoon until you achieve your preferred consistency. Too thin? Beat in more powdered sugar by the quarter cup.
This frosting tastes decidedly chocolatey without overwhelming sweetness, complementing the cake’s balanced flavor rather than competing with it.
Assembling Your Showstopping Layers
Once cake layers cool completely—and they must be completely cool or frosting melts disappointingly—you’re ready to assemble. Place your first layer on a serving plate or cake stand, top-side down so the flat bottom becomes your working surface. Consider tucking strips of parchment under the cake’s edges to keep your plate clean during frosting—pull them out when finished for pristine presentation.
Spread approximately one cup of frosting across this first layer, going all the way to edges. Don’t skimp here—generous filling creates that classic layer cake appearance everyone loves. Place the second layer on top, also inverted so its flat bottom becomes the top surface. This creates a level cake without needing to trim domed tops.
Apply a thin layer of frosting all over the entire cake—this “crumb coat” seals in loose crumbs that would otherwise mar your final frosting. Refrigerate the crumb-coated cake for twenty minutes to let this layer firm up.
Now apply the remaining frosting generously, smoothing it with an offset spatula or butter knife. For that retro dessert recipes aesthetic, leave the frosting somewhat rustic rather than perfectly smooth—vintage cakes rarely featured the mirror-smooth finish modern decorating demands. Swirls and swoops add character and honestly look more appealing than forced perfection.
Why This Method Produces Superior Results
The science behind this classic chocolate cake recipe explains its consistent success. Hot liquid blooming cocoa powder releases flavor compounds impossible to access otherwise, intensifying chocolate taste without adding chocolate. The high ratio of liquid to flour creates steam during baking that keeps crumb tender while preventing gluten from toughening.
Using both baking soda and baking powder provides insurance—soda reacts immediately with buttermilk’s acid while powder offers delayed action once heat activates it. This staged leavening creates even rise and fine texture. The oil contributes moisture that remains stable over days, unlike butter-based cakes that sometimes dry out.
Storing and Serving Your Creation
This timeless chocolate cake keeps remarkably well thanks to its moisture-retaining formula—another hallmark of heritage baking recipes designed when daily baking wasn’t practical. Store covered at room temperature for up to four days. The flavor actually improves on day two as components meld and mellow.
Refrigeration extends life to a week but firms the frosting significantly. Bring refrigerated cake to room temperature before serving for best texture and flavor—about thirty minutes accomplishes this.
Freeze unfrosted layers wrapped tightly in plastic then aluminum foil for up to three months. Thaw overnight in the refrigerator before bringing to room temperature and frosting. The texture survives freezing beautifully, making this ideal for advance preparation before celebrations.
Variations Honoring the Original
While purists might argue against modifications, even Depression-era bakers adapted recipes based on availability and preference. These variations maintain the spirit while offering different expressions:
Mocha version: Replace half the hot coffee with strong espresso for pronounced coffee undertones that enhance chocolate. Add one tablespoon instant espresso powder to frosting.
Mint chocolate: Add one teaspoon peppermint extract to cake batter and frosting for refreshing contrast. Crush peppermint candies between frosting layers for textural surprise.
Orange chocolate: Incorporate two tablespoons orange zest into batter and one tablespoon into frosting. The citrus brightness lifts chocolate’s depth beautifully.
Peanut butter filling: Spread peanut butter between layers before frosting, creating a Reese’s-inspired variation that wasn’t possible in the 1930s but honors American flavor preferences.
Occasions Worthy of This Cake
This old-fashioned chocolate layer cake suits countless celebrations. Birthday parties benefit from its crowd-pleasing flavor and impressive appearance. Holiday gatherings appreciate its nostalgic appeal. Potlucks love how it travels and serves easily. It’s fancy enough for weddings yet approachable enough for casual weeknight dessert.
The cake’s vintage chocolate cake aesthetic makes it perfect for themed parties celebrating different eras. Served on Depression glass plates with vintage forks, it becomes conversation piece as much as dessert. Yet it’s equally at home on modern white plates at contemporary gatherings—good cake transcends trends.
Teaching History Through Baking
Beyond delicious dessert, this heritage chocolate layer cake connects us to previous generations and their resourcefulness. Discussing the 1930s context while baking teaches valuable lessons about making do with less, finding joy despite hardship, and how constraints sometimes force creativity that abundance never demands.
Share stories about your own family’s baking traditions while making this cake. Did your grandmother have a similar recipe? What special occasions warranted layer cakes in her household? These conversations preserve history more effectively than history books, creating living connections across generations.
Troubleshooting Vintage Technique
If your cake seems too fragile to remove from pans, you didn’t wait the full fifteen minutes before inverting. The structure needs time to stabilize. Next time, be patient—those minutes matter.
Dry crumb indicates overbaking or measuring flour incorrectly. Spoon flour into measuring cups rather than scooping directly from the bag, which compacts it and adds too much. Pull the cake from the oven when a toothpick shows moist crumbs, not when it’s completely clean.
Dense, heavy texture suggests overmixing after adding flour or using expired leavening agents. Check dates on your baking soda and powder—they lose potency over time. Mix only until ingredients combine, then stop immediately.
Frosting that won’t spread smoothly needs more liquid or wasn’t beaten long enough. Add milk gradually and beat thoroughly—proper buttercream takes time to develop its silky texture.
The Beauty of Simple Excellence
In our current era of salted caramel this and matcha that, there’s something profoundly satisfying about traditional chocolate cake layers that rely on fundamental flavors executed perfectly. This heritage chocolate layer cake doesn’t apologize for its straightforwardness—it celebrates it.
The depth of chocolate flavor, the tender crumb that yields gently to your fork, the sweet richness of buttercream—these elements need no embellishment or trendy additions. They’re enough because they’re done right, honoring techniques refined through generations of home bakers who knew good cake when they tasted it.
Your Journey Into Heritage Baking
Start with this recipe exactly as written to understand how Depression-era techniques produce modern results. Notice the thin batter’s texture and trust it despite seeming wrong. Observe how hot coffee transforms the mixture. Taste the difference proper blooming makes in cocoa’s intensity.
Once you’ve mastered the original, explore the variations or create your own while respecting the fundamental method. The template works reliably, allowing creativity within structure—exactly what good heritage baking recipes provide.
Keep notes on your attempts. Did your oven require more or less time? Would you prefer sweeter frosting? Should you try the mocha version next? These observations personalize the recipe while maintaining its essential character and historical connection.
Welcome to baking that honors the past while serving the present—where simple ingredients and patient technique create something genuinely special. This chocolate cake with buttercream represents more than dessert; it’s edible history, comfort in cake form, and proof that sometimes the old ways remain the best ways. Your masterpiece awaits.