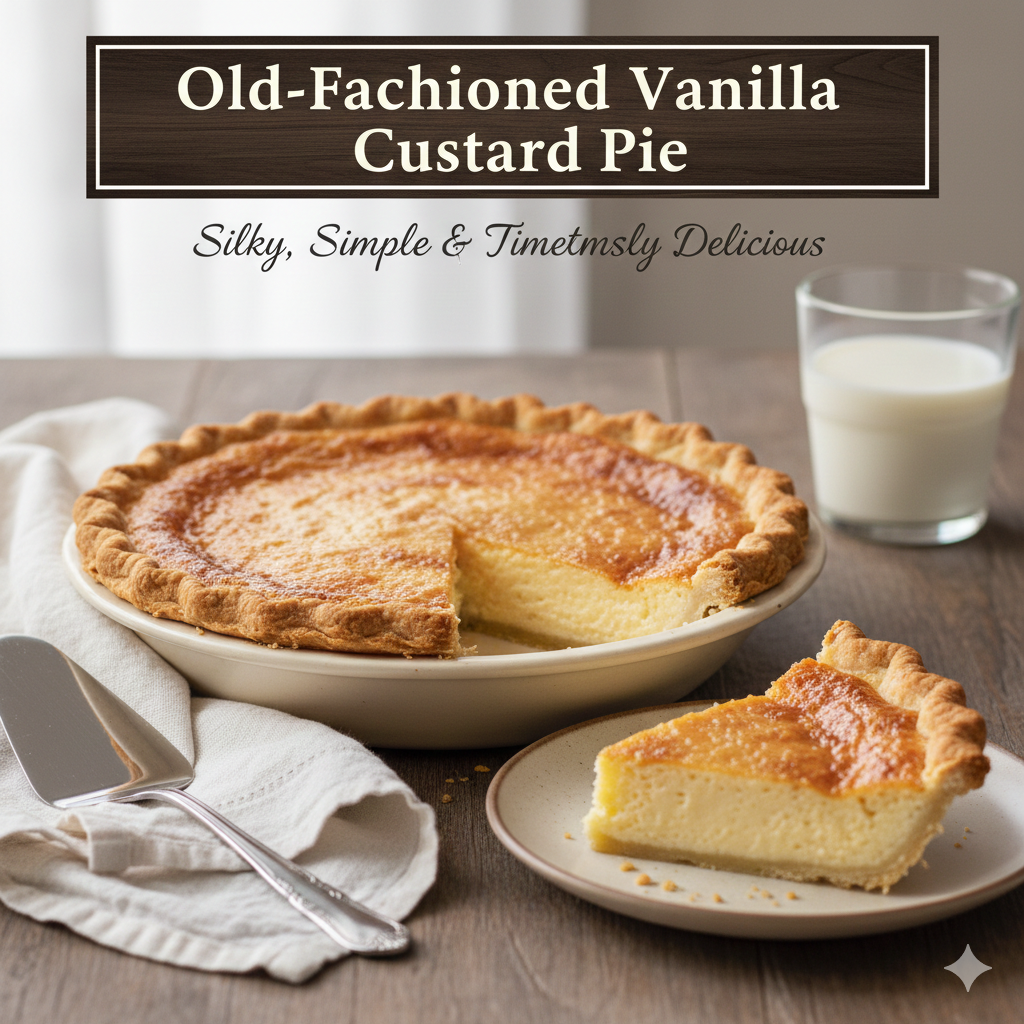
Old-Fashioned Vanilla Custard Pie: Silky, Simple & Timelessly Delicious
Few desserts capture the essence of simple elegance quite like an old-fashioned vanilla custard pie emerging from the oven with its golden surface barely set and trembling with promise. This classic comfort dessert relies on the most basic ingredients—eggs, milk, sugar, and vanilla—yet transforms them through patient baking into something remarkably sophisticated. It’s the kind of unpretentious pie grandmothers made famous, proving that spectacular results don’t require exotic components or complicated techniques, just quality ingredients treated with respect.
Understanding What Makes Custard Pie Special
Unlike cream pies made with pudding or fruit pies thickened with cornstarch, true custard pie achieves its silky texture through eggs alone. The proteins in eggs coagulate when heated gently, creating structure that’s simultaneously firm enough to slice yet tender enough to melt on your tongue. This delicate balance requires proper technique—too much heat and you get weepy, curdled custard; too little and it never sets.
The simplicity demands excellence in execution. With nowhere to hide behind complex flavors or elaborate presentations, every component matters. Fresh eggs, quality vanilla extract, and proper baking technique separate mediocre custard from the transcendent version that makes people close their eyes and sigh with satisfaction.
Crafting the Perfect Pie Crust
While you can use store-bought crust, homemade pastry elevates this pie from good to genuinely special. The flaky, buttery crust provides textural contrast to the smooth custard while its slight saltiness balances the filling’s sweetness.
For the crust:
- One and a quarter cups all-purpose flour
- Half teaspoon salt
- Half teaspoon sugar
- Half cup cold unsalted butter, cut into small cubes
- Three to four tablespoons ice water
Whisk together flour, salt, and sugar in a large bowl. Add cold butter cubes, using a pastry cutter or your fingers to work butter into flour until the mixture resembles coarse crumbs with some pea-sized butter pieces remaining.
Sprinkle three tablespoons of ice water over the mixture and toss with a fork just until dough begins coming together. Add the fourth tablespoon only if needed—too much water creates tough crust. The dough should hold together when squeezed but still look somewhat shaggy.
Turn dough onto a lightly floured surface and shape into a disk. Wrap tightly in plastic wrap and refrigerate for at least thirty minutes. This chilling allows gluten to relax and butter to firm up, creating tenderness and making rolling easier.
On a floured surface, roll chilled dough into a circle about twelve inches in diameter and one-eighth inch thick. Transfer to a nine-inch pie plate, gently pressing into the bottom and up the sides. Trim excess to half an inch beyond the plate edge, fold under, and crimp decoratively. Refrigerate while you prepare the filling.
Creating Silky Vanilla Custard
The filling embodies simplicity itself—just five ingredients combined carefully to create magic.
For the custard:
- Four large eggs
- Two-thirds cup granulated sugar
- Two cups whole milk
- Two teaspoons vanilla extract
- Quarter teaspoon salt
- Pinch of nutmeg for topping
Preheat your oven to 425°F—custard pies need high initial heat to set the crust before lowering temperature for gentle custard cooking.
In a large bowl, whisk eggs just until blended—don’t beat them to foam since you don’t want air bubbles in the finished custard. Add sugar and whisk until dissolved and the mixture becomes slightly pale and thick.
Heat milk in a small saucepan or microwave until warm but not hot—around 110°F. Gradually whisk warm milk into the egg mixture, adding it slowly to avoid scrambling the eggs. Stir in vanilla and salt.
Strain the custard through a fine-mesh sieve into a large measuring cup or pitcher. This removes any bits of cooked egg and creates ultra-smooth filling. The straining step seems fussy but dramatically improves the final texture.
Baking Without Weeping or Curdling
Place your chilled pie shell on a baking sheet (this prevents spills and makes handling easier). Pull out the oven rack slightly and position the pie on it. Carefully pour the strained custard into the shell, filling to within one-quarter inch of the rim.
Gently sprinkle the surface with nutmeg—just a whisper, not a heavy coating. The nutmeg adds aromatic complexity while signaling this as a custard pie rather than cream pie.
Carefully slide the rack back into the oven, trying not to slosh the liquid filling. Bake at 425°F for fifteen minutes. This high heat sets the crust and gives the custard a head start.
After fifteen minutes, reduce temperature to 325°F without opening the oven door. Continue baking for thirty to thirty-five minutes longer until the custard is set around the edges but still jiggles slightly in the center when gently shaken—think thick gelatin movement, not liquid rippling.
The center will firm up completely as the pie cools from carryover heat. Overbaking creates weepy, curdled texture with liquid pooling around the edges—the most common custard pie mistake. Pull it when that center still wobbles even though your instincts scream it’s underdone.
The Critical Cooling Period
Remove the pie from the oven when properly done and place it on a wire rack. Let it cool at room temperature for at least two hours, preferably three. During this time, the custard completes its setting while residual heat finishes the cooking process gently.
Never refrigerate a hot or warm custard pie—the sudden temperature change can cause cracking or weeping. Once cooled completely to room temperature, you can refrigerate it if desired, though many people prefer custard pie at room temperature where its delicate flavor shines brightest.
The pie slices best when thoroughly chilled, creating neat wedges rather than soft-set portions. However, the flavor and texture are arguably better at cool room temperature rather than cold from the refrigerator. Consider your priorities—presentation or optimal taste.
Serving This Timeless Classic
Slice the pie into eight wedges using a sharp knife wiped clean between cuts for the neatest presentation. Each slice should reveal smooth, creamy custard with no weeping or graininess.
Serve plain, letting the pure vanilla custard speak for itself. This simple approach honors the pie’s essential character—no whipped cream, no fruit, no chocolate drizzle necessary. The perfection lies in the custard’s silky texture and delicate vanilla flavor.
For those who insist on embellishment, a small dollop of unsweetened whipped cream provides pleasant richness without overwhelming the custard. Fresh berries on the side offer fruity contrast. A light dusting of additional nutmeg adds aromatic interest.
Storage and Food Safety
Custard pies contain eggs and milk, requiring refrigeration after initial cooling. Cover loosely (plastic wrap directly on custard can mar the surface) and refrigerate for up to three days. The texture remains best on the day it’s made, gradually becoming denser and slightly rubbery over subsequent days, though it stays safe and edible.
Never leave custard pie at room temperature for more than two hours total—the time between baking and initial cooling counts toward this. Bring refrigerated pie to cool room temperature before serving by letting it sit out for thirty to forty-five minutes, which improves both flavor and texture.
Troubleshooting Common Challenges
Watery custard that never fully sets indicates underbaking or eggs that weren’t fresh. Always bake until only the center wobbles, and use the freshest eggs possible. If you pulled it too early, there’s no fix—the custard needed more time in the oven.
Curdled, grainy texture means overbaking or oven temperature too high. Use an oven thermometer to verify actual temperature, and remember that slight center jiggle is correct, not a mistake. The carryover cooking finishes what the oven started.
Weeping (liquid pooling at the bottom or sides) results from overbaking, too much sugar, or temperature too high during baking. Follow timing carefully and don’t exceed 325°F during the main baking phase.
Soggy bottom crust suggests the custard wasn’t strained well or the pie wasn’t baked on a preheated baking sheet. Always strain the filling and use a baking sheet to conduct heat efficiently to the crust.
Variations on the Theme
Once you’ve mastered the classic, subtle variations keep things interesting. Coconut custard pie adds three-quarters cup of sweetened shredded coconut to the filling. Maple custard pie replaces half the sugar with pure maple syrup. Lemon custard pie incorporates lemon zest and juice for bright citrus notes.
Chocolate custard pie adds quarter cup of cocoa powder to the sugar before whisking into eggs. Butterscotch custard pie uses brown sugar instead of white and adds extra butter. Each variation maintains the essential custard technique while offering different flavor expressions.
Chess pie—a Southern cousin—adds cornmeal and vinegar to this same base, creating a slightly different texture and flavor profile while using nearly identical technique.
Why This Heritage Recipe Endures
Beyond delicious simplicity, this pie represents values of making much from little—creating sophistication from humble pantry staples through proper technique rather than expensive ingredients. It embodies the kind of honest dessert that doesn’t try to impress through elaborate presentation, trusting that proper execution speaks for itself.
The recipe also connects us to culinary history. Custard pies have graced tables for centuries, surviving because they genuinely satisfy rather than following fleeting trends. Making one yourself creates living links to previous generations who found joy in the same simple pleasure.
Your Path to Custard Perfection
Start with this recipe exactly as written to understand how proper custard behaves. Notice the filling’s texture before baking—smooth and liquid. Observe that critical wobble indicating doneness. Experience the transformation from liquid to silky solid during cooling.
After succeeding with the original, explore variations that appeal to your preferences. Maybe you love coconut or prefer chocolate. Perhaps maple syrup calls to you. These adaptations personalize the recipe while respecting its fundamental character.
Welcome to baking that celebrates simplicity and technique over complexity and expense—where basic ingredients become extraordinary through patient, careful handling, and where the best desserts often require the fewest components, just the most attention and respect. Your silky, golden triumph awaits in the oven.