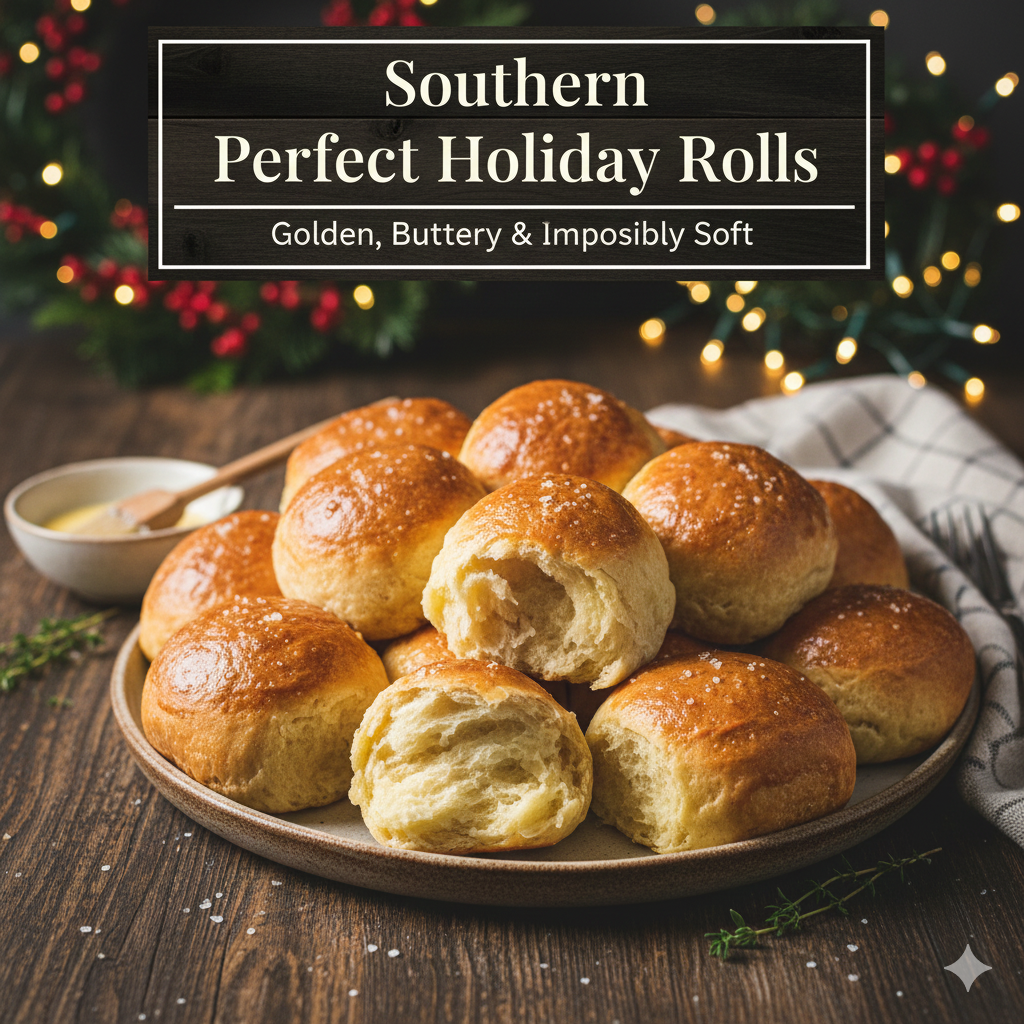
Perfect Holiday Rolls – Fluffy & Homemade: Golden, Buttery & Impossibly Soft
Few kitchen accomplishments match the satisfaction of pulling a pan of golden, fragrant homemade rolls from the oven while holiday guests arrive, their buttery aroma announcing that something special awaits at the table. These perfect holiday rolls deliver that cloud-like texture and rich flavor that make people reach for seconds before they’ve finished their firsts, transforming an ordinary meal into something memorable through the simple magic of properly made yeast bread.
Why Homemade Rolls Elevate Every Gathering
Store-bought rolls certainly offer convenience, but they can’t compete with the tender crumb, buttery richness, and pride of accomplishment that come with baking your own. These fluffy homemade rolls signal to guests that you’ve invested genuine care in the meal, setting a tone of warmth and hospitality that aluminum foil packages simply cannot convey.
Beyond the emotional impact, homemade rolls taste incomparably better. The texture stays soft for days rather than turning stale within hours. You control exactly what goes into them—real butter, quality flour, no preservatives or dough conditioners. The flavor develops through proper fermentation rather than artificial enhancers, creating complexity store-bought versions never achieve.
Understanding Yeast and What It Needs
Yeast intimidates many home bakers, but understanding its simple requirements removes the mystery. Yeast is a living organism that feeds on sugar and produces carbon dioxide gas, creating the bubbles that make bread rise. It needs three things: food (sugar and flour), moisture (water or milk), and warmth (ideally 75°F to 85°F).
Active dry yeast requires “proofing”—dissolving in warm liquid with a bit of sugar to activate it. You’ll know it’s alive when the mixture becomes foamy after five to ten minutes. Instant yeast can be mixed directly into dry ingredients, skipping the proofing step, though proofing provides reassurance that your yeast is viable before you’ve invested time and ingredients.
Temperature matters enormously. Liquid that’s too hot kills yeast instantly—aim for 105°F to 110°F, which feels comfortably warm but not hot when tested on your wrist. Too cold and yeast stays dormant, causing dough that never rises properly.
Essential Ingredients for Success
Quality ingredients create quality results, though nothing here requires specialty shopping. These components work together to create the tender, flavorful rolls your holiday table deserves.
Complete ingredient list:
- Four and a half cups all-purpose flour, divided
- Two and a quarter teaspoons active dry yeast (one standard packet)
- One and a half cups whole milk, warmed to 110°F
- Quarter cup granulated sugar
- Six tablespoons unsalted butter, melted and slightly cooled
- One large egg, room temperature
- One and a half teaspoons salt
For brushing:
- Two tablespoons melted butter
The milk creates more tender crumb than water-based doughs. Butter provides rich flavor and soft texture. Sugar feeds the yeast while adding subtle sweetness. The egg contributes color, flavor, and structure. Each ingredient serves specific purposes beyond mere presence in the recipe.
Mixing and Kneading the Dough
Combine warm milk, sugar, and yeast in a large bowl or stand mixer bowl. Let this mixture sit for five to ten minutes until foamy on top—this proves your yeast is alive and active. If no foam appears, your yeast is dead; discard and start over with fresh yeast.
Add melted butter, egg, and salt to the yeast mixture, whisking to combine. Add two cups of flour and mix on low speed (or stir by hand) until incorporated. Gradually add remaining flour half a cup at a time, mixing between additions, until the dough comes together and pulls away from the bowl sides. You may not need all the flour, or you might need slightly more—dough consistency matters more than exact measurements.
Turn dough onto a lightly floured surface and knead for eight to ten minutes by hand, or use a stand mixer with a dough hook for six to eight minutes on medium-low speed. Proper kneading develops gluten strands that create structure and allow the dough to trap gas bubbles effectively. The dough should become smooth, elastic, and slightly tacky but not sticky.
To test if you’ve kneaded enough, perform the “windowpane test”—stretch a small piece of dough between your fingers. If it stretches thin enough to see light through without tearing, gluten development is sufficient.
The First Rise: Patience Rewarded
Shape kneaded dough into a smooth ball and place it in a lightly oiled bowl, turning once to coat all surfaces. Cover with a damp towel or plastic wrap to prevent drying. Place in a warm, draft-free location to rise until doubled in size—typically sixty to ninety minutes depending on room temperature.
The ideal rising environment is around 75°F to 80°F. A turned-off oven with the light on creates perfect warmth. Alternatively, place the bowl near (not on) a heating vent, or set it in a barely warm oven that’s been preheated briefly then turned off.
Don’t rush this rise—developing flavor requires time. The dough should feel light and puffy when poked, and the indentation should remain rather than springing back immediately.
Shaping Individual Rolls
Once doubled, punch down the dough to release built-up gas. Turn it out onto a lightly floured surface and divide into sixteen equal pieces for standard-sized rolls, or twenty-four pieces for smaller dinner rolls. A kitchen scale ensures uniform sizing, but eyeballing works fine if you’re comfortable estimating.
To shape each piece into a smooth ball, cup your hand over the dough and move your hand in small circles on the counter, using slight downward pressure. The dough’s friction against the counter pulls the surface tight, creating a smooth top with seams gathered underneath. This tension helps rolls maintain shape during the final rise and baking.
Arrange shaped rolls in a greased 9×13-inch baking pan, spacing them about an inch apart. As they rise and bake, they’ll expand to touch each other, creating those characteristic soft, pull-apart sides. Alternatively, place rolls on parchment-lined baking sheets with more space between them for rolls with crust on all sides.
The Second Rise: Final Preparation
Cover shaped rolls loosely with a damp towel or plastic wrap and let them rise again until nearly doubled in size, about thirty to forty-five minutes. This second rise allows gluten to relax after shaping while giving rolls their final volume.
The rolls are ready for the oven when they look puffy and a gentle poke leaves a slight indentation that slowly springs back. If the dough springs back immediately, give it more time. If the indentation remains completely, you’ve let them overproof—they’ll still bake fine but might have slightly coarser texture.
Baking to Golden Perfection
Preheat your oven to 375°F about twenty minutes before you expect the second rise to complete. Bake rolls for eighteen to twenty-two minutes until the tops turn deep golden brown and the internal temperature reaches 190°F to 200°F when tested with an instant-read thermometer.
The rolls should sound hollow when tapped on the bottom—though this is difficult to test when they’re arranged in a pan. Visual cues and temperature provide more reliable indicators of doneness.
Remove from the oven and immediately brush tops generously with melted butter. This creates glossy, flavorful surfaces while keeping the crust soft rather than crusty. Let rolls cool in the pan for five minutes, then transfer to a wire rack or serve warm directly from the pan.
Make-Ahead Strategies for Holiday Sanity
These golden buttery rolls accommodate advance preparation beautifully—crucial when juggling multiple holiday dishes. After shaping, you can refrigerate rolls for up to twenty-four hours before the second rise. Cover tightly with plastic wrap to prevent drying. When ready to bake, remove from refrigeration and let them come to room temperature and complete their rise—this takes sixty to ninety minutes.
Alternatively, freeze shaped rolls on a baking sheet until solid, then transfer to freezer bags for up to one month. Bake from frozen, allowing extra time for the second rise and adding a few minutes to baking time.
Fully baked rolls freeze excellently for up to three months. Cool completely, wrap tightly, and freeze. Thaw at room temperature, then refresh in a 350°F oven for five to seven minutes to restore that just-baked quality.
Variations on the Classic Theme
Once comfortable with the base recipe, creative variations prevent boredom. Herb rolls incorporate two tablespoons of minced fresh rosemary, thyme, or sage into the dough. Garlic butter rolls get brushed with garlic-infused melted butter instead of plain. Cheese rolls fold in three-quarters cup of shredded cheddar during mixing.
Sweet variations add an extra tablespoon of sugar and include cinnamon or orange zest. Whole wheat rolls substitute one cup of whole wheat flour for one cup of all-purpose, creating nuttier flavor and slightly denser texture. Honey butter rolls replace half the sugar with honey and brush with honey butter instead of plain butter.
Shape variations create visual interest too. Form dough into crescents, knots, or cloverleaf rolls for elegant presentation. The technique remains identical—only the shaping changes.
Troubleshooting Common Issues
Dense, heavy rolls indicate insufficient kneading, overproofing, or too much flour. Measure flour by spooning into cups and leveling rather than scooping, which compacts it. Knead thoroughly and watch rising times carefully—overproofed dough can’t maintain structure during baking.
Rolls that don’t rise properly signal dead yeast, liquid that was too hot or too cold, or an environment too cold for proper fermentation. Always proof yeast to confirm it’s active, check liquid temperature with a thermometer, and find a consistently warm spot for rising.
Tough, chewy texture suggests overkneading (difficult to achieve by hand but possible with stand mixers) or using bread flour instead of all-purpose. All-purpose flour’s lower protein content creates tenderness appropriate for rolls, while bread flour produces chewier results better suited for crusty artisan loaves.
Pale tops mean insufficient baking time or oven temperature too low. Use an oven thermometer to verify actual temperature, and don’t be afraid to leave rolls in an extra few minutes to achieve proper color—golden brown, not blonde.
Serving These Impossibly Soft Delights
Serve rolls warm or at room temperature, never cold. If baked ahead, refresh them briefly in a warm oven to restore softness and release aromas. Present them in a cloth-lined basket or directly from the baking pan, letting people pull apart their own portions—that connection to freshly baked bread enhances the entire experience.
Provide softened butter alongside, perhaps whipped with honey or herbs for special occasions. These rolls need minimal accompaniment since they’re delicious alone, but quality butter elevates good to exceptional.
For holiday dinners, coordinate timing so rolls emerge from the oven just as everyone sits down. That aroma creates anticipation while the warmth makes them irresistible.
The Emotional Value of Homemade Bread
Beyond nutrition and flavor, baking bread for loved ones communicates care and effort in ways purchased items simply cannot. The time invested, the attention required, the skills developed—these signal importance and love more clearly than words sometimes do.
Many people’s strongest food memories center around homemade bread—the smell, the warmth, the comfort. Creating these experiences for your family and guests builds traditions that outlast any single meal, forming connections across generations.
Your Path to Roll-Baking Confidence
Start with this recipe exactly as written to understand how yeast dough behaves. Notice the texture at each stage—after kneading, after first rise, after shaping, after second rise. Observe how warmth affects rising speed. Taste how fresh-baked rolls differ from any alternative.
Once you’ve succeeded with the original, explore variations that match your household preferences. Maybe you prefer more butter, different herbs, or sweeter rolls. These adjustments personalize the recipe while maintaining its essential character.
Welcome to the deeply satisfying practice of bread baking, where simple ingredients and patient technique create something greater than the sum of their parts. These perfect holiday rolls prove that some traditions endure because they simply cannot be improved upon—only honored through continued practice and sharing. Your golden, aromatic triumph awaits in the oven.