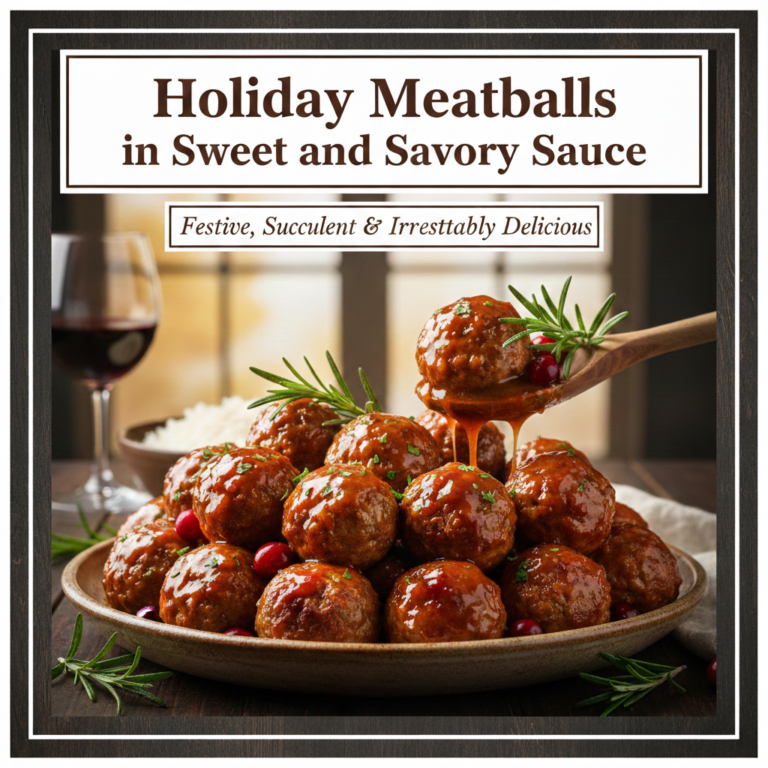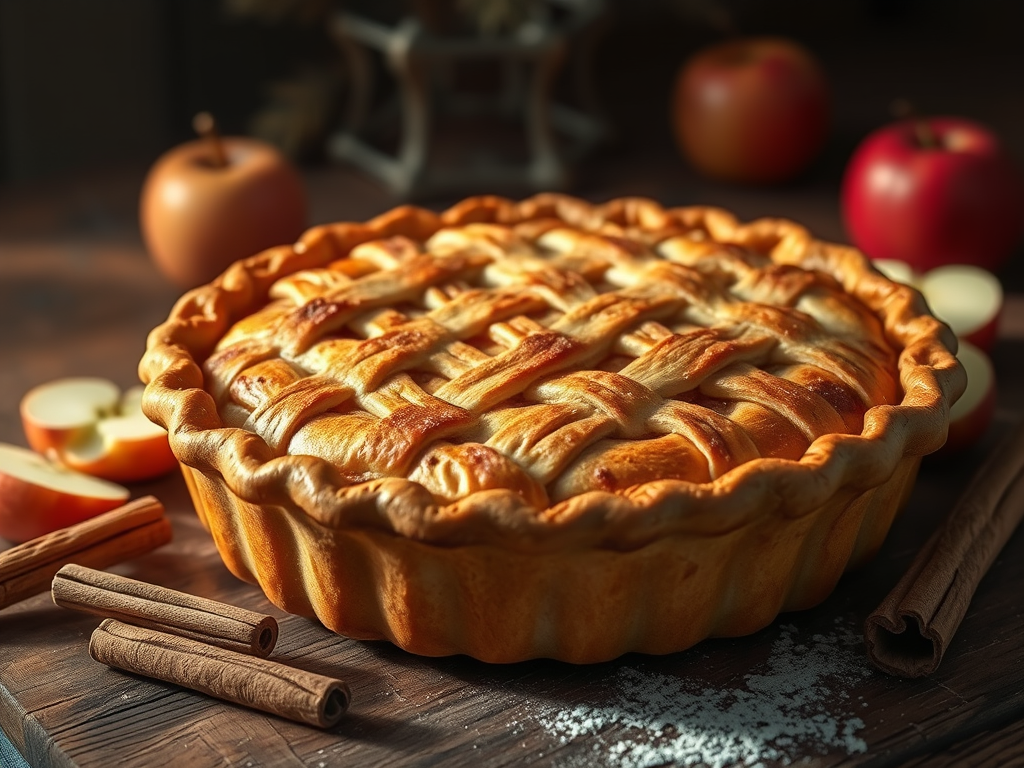
Cinnamon-Spiced Apple Pie for the Holidays: Classic, Cozy & Crowd-Pleasing
When holiday tables groan under their burden of casseroles and roasts, one dessert commands reverence above all others—a perfectly executed cinnamon-spiced apple pie emerging from the oven with steam venting through its lattice top and the intoxicating aroma of baked apples and spice filling every corner of your home. This isn’t just dessert—it’s edible tradition, comfort baked into pastry, the taste of holidays distilled into a single slice that somehow manages to be both nostalgia and pure present-moment pleasure.
What Separates Extraordinary from Ordinary
Anyone can dump canned filling into a store-bought crust and call it apple pie. Creating a truly memorable holiday apple pie recipe requires understanding what makes this dessert spectacular rather than merely acceptable. The filling must balance tender-yet-structured apples with just enough sweetness offset by spice complexity. The crust needs to shatter at first bite while maintaining enough structure to contain bubbling juices. Everything must work in harmony—crust, filling, and spice creating unified experience rather than competing elements.
The difference shows most clearly in texture. Inferior pies suffer from mushy apple filling that tastes like baby food, or conversely, crunchy apples that never properly cooked. The pastry either crumbles into dust or turns soggy from inadequate venting. This classic apple pie with cinnamon formula avoids all those pitfalls through careful technique and proper ingredient selection.
Selecting Apples That Perform
Apple choice matters more than most people realize. Different varieties behave distinctly during baking—some turn to applesauce while others stay firm, some taste bland while others provide perfect sweet-tart balance. The secret to exceptional filling lies in mixing varieties rather than relying on a single type.
Ideal apple combinations:
Granny Smith apples provide structural backbone and necessary tartness. Their high acid content balances sweetness while their firm flesh resists breaking down during baking. Use them for roughly forty percent of your apple total.
Honeycrisp or Fuji apples contribute sweetness and maintain pleasant texture. Their natural sugar means you need less added sweetener, while their moderate firmness creates appealing bite. These comprise about thirty percent of the mix.
Jonagold, Braeburn, or Golden Delicious round out the blend, adding complexity and aroma. These twenty to thirty percent additions elevate the filling from good to memorable.
Avoid Red Delicious, which turn mealy and tasteless when baked, or McIntosh, which completely disintegrate into sauce. Calculate approximately two and a half to three pounds of apples total for a standard nine-inch pie—roughly six to eight medium apples depending on size.
Crafting Foolproof Flaky Crust
The foundation of any homemade apple pie begins with pastry that’s tender, flaky, and golden. While store-bought options exist, nothing compares to crust made from scratch using simple ingredients and proper technique.
All-butter pastry formula:
- Two and a half cups all-purpose flour
- One tablespoon granulated sugar
- One teaspoon salt
- One cup (two sticks) cold unsalted butter, cubed
- Six to eight tablespoons ice water
Whisk together flour, sugar, and salt in a large bowl. Add cold butter cubes and work them into the flour using a pastry cutter, two knives, or your fingertips until the mixture resembles coarse meal with some pea-sized butter bits remaining. These butter pieces create flakiness during baking as they release steam.
Drizzle in ice water one tablespoon at a time, mixing gently with a fork after each addition. Stop adding water when the dough just begins holding together when squeezed. It should look shaggy, not smooth—overworking develops gluten that creates tough crust.
Divide dough into two disks (one slightly larger for the bottom), wrap each tightly in plastic wrap, and refrigerate at least one hour or up to three days. This resting period allows gluten to relax and ensures flaky texture.
Creating the Perfect Spiced Apple Pie Filling
The filling transforms humble fruit into something transcendent through careful preparation and thoughtful seasoning. This isn’t the moment to rush or estimate measurements—precision matters for consistent results.
Filling components:
- Six to eight mixed apples (about three pounds), peeled, cored, and sliced quarter-inch thick
- Three-quarters cup granulated sugar (adjust based on apple sweetness)
- Quarter cup packed light brown sugar
- Two tablespoons all-purpose flour
- One tablespoon cornstarch
- One and a half teaspoons ground cinnamon
- Quarter teaspoon ground nutmeg
- Eighth teaspoon ground allspice
- Eighth teaspoon salt
- One tablespoon lemon juice
- One teaspoon vanilla extract
- Two tablespoons cold butter, cut into small pieces
Toss sliced apples in a large bowl with both sugars, flour, cornstarch, cinnamon, nutmeg, allspice, and salt. The flour and cornstarch absorb released juices during baking, creating sauce that coats fruit without being soupy. Let this mixture sit for fifteen minutes—sugar draws out apple moisture while spices begin penetrating the fruit.
Stir in lemon juice and vanilla. The acid brightens flavors and prevents browning while vanilla adds aromatic depth that makes people wonder what makes your pie taste so special.
Assembly and Baking Technique
Remove your chilled dough from refrigeration and let it sit for five to ten minutes—rock-hard dough cracks when rolled. On a lightly floured surface, roll the larger disk into a twelve-inch circle about one-eighth inch thick. Transfer to a nine-inch pie plate by rolling it around your rolling pin, then unrolling it over the pan.
Gently press dough into the pan without stretching, which causes shrinkage during baking. Trim edges leaving one-inch overhang. Pile the apple filling into the prepared crust, mounding it slightly in the center—it will shrink during baking. Dot the filling with butter pieces, which enrich the sauce and add glossy finish.
Roll remaining dough into an eleven-inch circle. You can either drape it whole over the filling, cutting decorative vents for steam release, or create a lattice top for show-stopping presentation. For lattice, cut dough into one-inch strips and weave them over the filling, alternating over-under pattern.
Fold bottom crust overhang over lattice or top crust edges and crimp decoratively using fingers or fork tines. This sealed edge prevents filling from bubbling out during baking while creating attractive border.
The Critical Baking Process
Brush the top crust with beaten egg wash (one egg beaten with one tablespoon water) for golden shine. Sprinkle with coarse sugar for sparkle and crunch. Place pie on a rimmed baking sheet lined with foil or parchment to catch any drips.
Bake at 425°F for twenty minutes, then reduce temperature to 375°F and continue baking forty-five to fifty-five minutes longer. The pie is done when the crust turns deeply golden brown and filling bubbles vigorously through vents or lattice openings. Internal temperature should reach 200°F if you’re using a thermometer.
If the crust edges brown too quickly, tent them with aluminum foil or use a pie shield. Under-baking leaves you with crunchy apples and thin sauce, while over-baking creates mushy filling and burnt crust.
The Crucial Cooling Period
This might be the hardest part—letting your Thanksgiving apple pie cool completely before slicing. Hot filling is too liquid to slice neatly; it needs at least four hours at room temperature for the sauce to set properly. Overnight cooling produces the cleanest slices with filling that clings to apples rather than running across the plate.
Resist cutting into warm pie even though the aroma drives you mad with anticipation. The wait makes such a difference in presentation and texture that it’s absolutely worth the self-control required.
Serving Your Masterpiece
Once properly cooled, slice generous wedges and plate them with ceremony befitting the effort invested. Classic accompaniments include vanilla ice cream melting into warm pie (if you choose to reheat individual slices), dollops of real whipped cream, or sharp cheddar cheese for those who appreciate the traditional pairing.
Some prefer pie at room temperature to fully appreciate the spice complexity, while others love it warmed to revive that fresh-from-the-oven experience. Both approaches have merit—let personal preference guide you.
Storage and Make-Ahead Strategy
This traditional apple pie recipe accommodates advance preparation beautifully. Unbaked assembled pies freeze successfully for up to three months. Wrap thoroughly in plastic wrap then aluminum foil, and bake directly from frozen, adding fifteen to twenty minutes to the baking time while tenting edges to prevent burning.
The pastry dough alone freezes for three months, making it easy to keep batches ready for spontaneous baking. Thaw overnight in the refrigerator before rolling.
Baked pie keeps at room temperature for two days or refrigerated for five days. Bring refrigerated slices to room temperature or warm them briefly in a 350°F oven for best flavor and texture.
Troubleshooting Common Challenges
Soggy bottom crust indicates either too much filling liquid or insufficient bottom heat. Bake on the lowest oven rack, and consider pre-baking (blind baking) the bottom crust for ten minutes before adding filling. Brushing the bottom crust with beaten egg white creates a moisture barrier.
Runny filling suggests insufficient thickener or cutting the pie too soon. Ensure you’re using both flour and cornstarch as directed, and exercise patience during cooling. If your apples are particularly juicy, increase cornstarch by one teaspoon.
Tough crust results from overworking dough or using too much water. Handle pastry minimally and add water conservatively—better slightly dry and crumbly than wet and tough. The dough should just barely hold together when pressed.
Bland filling means under-seasoning or poor apple selection. Taste your apple mixture before filling the crust and adjust sweetness or spice. Don’t be shy with cinnamon—this is meant to be warmly spiced, not subtly flavored.
Variations on the Classic
Once comfortable with the base flaky crust apple pie formula, creative variations keep things interesting. Caramel apple pie adds half cup of caramel sauce drizzled over the filling before adding top crust. Apple-cranberry combination folds in one cup of fresh or frozen cranberries for tart brightness.
Streusel-topped versions replace the top crust with buttery, cinnamon-laced crumb topping for different textural experience. Dutch apple pie incorporates this crumb topping while adding extra cinnamon and sometimes raisins.
Bourbon or brandy (two tablespoons) added to filling creates sophisticated adult version. Maple-sweetened variations substitute pure maple syrup for half the granulated sugar for subtle complexity.
Why This Becomes Your Signature Dessert
Beyond tasting delicious, mastering this Christmas dessert pie skill provides reliable showstopper for every holiday gathering. People remember and request specific pies—becoming “the person who makes that amazing apple pie” creates identity and tradition. The compliments and requests to bring it year after year validate your effort in deeply satisfying ways.
The process itself can become meditative—the rhythm of peeling and slicing apples, the feel of cold butter cutting into flour, the satisfaction of crimping perfect edges. These repetitive tasks ground you in the present while connecting you to countless bakers who’ve performed identical motions across generations.
Building Your Pie-Making Confidence
Your first attempt might produce imperfect results—perhaps the lattice weaving seems crooked or the filling leaked slightly. These minor issues resolve quickly as you develop feel for pastry and understand your oven’s quirks. Even imperfect pies taste wonderful and get devoured quickly.
Take notes about what worked and what you’d adjust. Did the filling seem too sweet or tart? Should you increase cinnamon next time? Would your family prefer a different apple ratio? These observations personalize the recipe while building expertise.
The Tradition-Building Power
Making this festive holiday desserts centerpiece annually creates rituals that define your celebrations. Children who help peel apples or weave lattice remember these moments into adulthood. The pie itself becomes part of holiday identity—it’s not really Thanksgiving without Aunt Sarah’s apple pie, or Christmas feels incomplete without Dad’s famous cinnamon version.
Photograph your pies over years and watch your skills improve. Save recipe cards with notes about adjustments. Pass down techniques to younger generations. These small acts create continuity and meaning beyond mere dessert.
Your Path to Apple Pie Mastery
Start with this recipe exactly as written to understand how components work together. Notice pastry’s texture, filling’s consistency, and how everything bakes and sets. Taste how spices develop and apples soften.
Once you’ve succeeded with the original, explore variations or adjust based on preferences. The framework handles creativity—fundamental ratios and techniques matter, but specific flavors and presentation details offer flexibility.
Welcome to creating old-fashioned apple pie that becomes anticipated tradition rather than obligatory dessert. This cinnamon-spiced apple pie proves that classics endure because they deliver genuine pleasure through quality ingredients, proper technique, and the love baked into every layer. Your holiday masterpiece awaits.